Pronics uses PolyWorks|Inspector™ to operate their
Nikon CNC CMM and optimize their dimensional analyses.
Pronics Co., Ltd. has been developing their business in Japan since 1989. It is based on the Inspection Measurement Department, which conducts the contract measurement service, as well as the Manufacturing Department, which handles the injection molding of plastic resin and precision mold production.

The Inspection Measurement Department provides various services to their clients. These include Contract Measurement, which involves measuring client parts using hardware devices, 3D CAD Comparison, which consists in comparing the measurements to CAD models , and finally Reverse Engineering, which provides clients with 3D CAD models created from part samples, without the use of drawings or CAD data. They also provide measurement training for customers who have difficulty taking over part-measurement-related tasks because of the shortage of manpower or who don’t have the know-how to train new employees. The members of the Inspection Measurement Department are dedicated to providing customers with valuable and high-quality services, including support. Pronics welcomes technical trainees from their affiliate company in Vietnam, contributing to human resource development and consequently to the economic development of developing countries.
The Challenge
The Inspection Measurement Department uses four CNC CMMs from Tokyo Seimitsu for precision probing as well as a Nikon CNC CMM with a high-precision laser scanner, acquired in 2014.
They implemented measurement operations by using 3D evaluation software and performed reverse engineering using modeling software from another vendor. The data volume increased tens to hundreds of times after adopting the Nikon CNC CMM. As a result, data processing became slow, their computer would freeze, unexpected errors were occurring with their software, and they were experiencing a loss in performance.
Pronics used dedicated software for each of their hardware devices. They decided to look for superior software for the Nikon CNC CMM. The Inspection Measurement Department was in charge of finding an optimal solution.
The Solution
The Inspection Measurement Department learned about the PolyWorks|Inspector software from a Nikon representative. They contacted PolyWorks Japan and one of their application specialists explained the product. Ms. Nao Tamura, Sub Chief of the Inspection Measurement Department, begins, “Pronics is a company that is entrusted with part measurement. We need to be able to meet a wide variety of customer requests. Therefore, we asked detailed questions concerning how color maps were calculated, how to measure geometric tolerances, and more. The PolyWorks Japan technical support team answered all of our questions.”
Ms. Tamura continues, “We found the PolyWorks|Inspector software has enhanced functions, and is fast and very stable, and easy to use. We were confident it could resolve our challenges. In the end, it was the knowledge of the PolyWorks application specialists that convinced us to install PolyWorks|Inspector.”
The Inspection Measurement Department obtained encouraging results when testing the PolyWorks|Inspector software with their Nikon CNC CMM. Firstly, PolyWorks|Inspector had no problems handling the large volume of data produced by the laser scanning operations. In addition, they found the inspection techniques and report creation easy to use. “We can quickly implement basic inspections,” evaluates Ms. Tamura. Now, they take their measurements with the Nikon CNC CMM using PolyWorks|Inspector’s CNC CMM plug-in and carry out their inspections using PolyWorks|Inspector’s dimensional analysis toolkit. This involves processing the 3D data obtained by the Nikon CNC CMM and comparing it to the CAD model. In addition, Pronics frequently uses the color map function of PolyWorks|Inspector, which enables them to measure the deviation of the scanned data points.
Ms. Tamura concludes, “Thanks to the support of the PolyWorks Japan team, we can take advantage of more PolyWorks|Inspector functionalities and we have mastered the inspection techniques that satisfy various kinds of customer needs and requests. The fact that there are professional engineers who accurately comprehend the function of their own products and the users’ requirements, and are available when we need them, is key for us.”

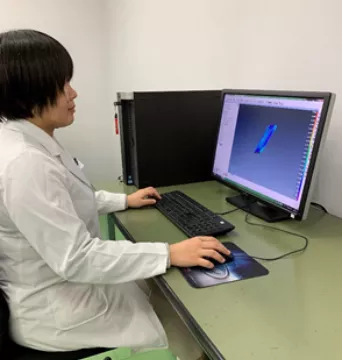
Figure 1 Ms. Tamura, along with two other team members, use PolyWorks|Inspector to measure parts by laser scanning on the CMM and to inspect the results using the comparison-to-CAD operation.

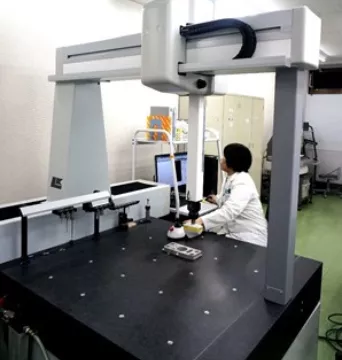
Figure 2 The processing speed for the measurement and the inspection of 3D data obtained by the CNC CMM has increased, thereby optimizing and reducing operation time.
The Benefits
The Inspection Measurement Department initially wanted to acquire a superior software for their hardware device, a Nikon CNC CMM with high-precision laser scanning. With PolyWorks|Inspector, they also obtained a superior 3D inspection software and technical support for their dimensional analysis requirements. Ms. Tamura states, “With PolyWorks|Inspector, we process our data more rapidly, work more efficiently, and have reduced our operating time! Furthermore, we have drastically reduced man-hours, because it is now easy to repeat inspections when the measurement of multiple pieces is required.”
Ms. Tamura adds, “The PolyWorks|Inspector software is updated frequently, and their application specialists provide excellent support for our operations and questions when we need help mastering the new functions. We can count on the PolyWorks Japan support team, whomever we ask. We would like to use an online support service from now on, which is much easier than communicating by phone or email."
She continued, "We are impressed by the initiatives undertaken by InnovMetric, creator of the PolyWorks software suite, to interconnect the measurement and manufacturing teams using PolyWorks|DataLoop™. Unfortunately, our teams work separately from each other at this time. One consequence is that the design drawing is not always correct when we look at it from a measurement point of view.”
PolyWorks implementation plans
- Utilize PolyWorks|Inspector for both scan data measurement and contract measurement.
- Increase their scanning data measurement service: Pronics receives 3D data from customers who have scanned their parts, but they do not receive the parts themselves. They currently use PolyWorks|Inspector to perform dimensional analyses on their customers’ scanned data.
- Provide reverse-engineering services with PolyWorks|Modeler™.
Business development for the future
Ms. Nami Morimoto, President, stated, “Pronics has established affiliated companies in Thailand and Vietnam (Ho Chi Minh and Hanoi). The company in Hanoi was newly opened and our upcoming goal is business expansion. The company in Ho Chi Minh is the only base which provides contract measurement services among the oversea bases. The areas of injection molding of plastic resin and precision mold production are currently our main businesses there. However, we would like to develop business for measurement and inspection in foreign bases as well. We are planning to expand to Myanmar in the near future.”
Pronics provides a variety of services including contract measurement, reverse engineering, scan data measurement, measurement training, and more. Pronics will continue using the PolyWorks software to improve the quality and efficiency of their services.